


វិទ្យាស្ថានបើកទូលាយ គឺជាអង្គការមិនមែនរដ្ឋាភិបាល និងមិនស្វែងរកប្រាក់ចំណេញ ដែលប្រមើលមើលថា ប្រទេសកម្ពុជានឹងក្លាយជាប្រទេសមួយ ដែលប្រជាជនមានសិទ្ធិស្មើគ្នាក្នុងការចូលទៅ កាន់ ចំណេះដឹង និងបច្ចេកវិទ្យាព័ត៌មាន ។ បេសកកម្មរបស់យើង គឺសម្របសម្រួលការទំនាក់ទំនង និងការចែករំលែកចំណេះដឹង ក្នុងការអភិវឌ្ឍន៍សង្គម ។ នាពេលបច្ចុប្បន្ននេះ អង្គការវិទ្យាស្ថានបើកទូលាយដំណើរការកម្មវិធីចំនួន ប្រាំ ៖ ស្ថាបនាភាពជាដៃគូដើម្បីបរិយាកាសទំនាក់ទំនងបែបច្នៃប្រឌិត (SPICE) កម្មវិធីផ្ដល់ភាពអង់អាចស្ត្រីដើម្បី ការផ្លាស់ប្ដូរសង្គម កម្មវិធីសាលារៀនបើកចំហ គម្រោងកម្មវិធីកុំព្យូទ័រភាសាខ្មែរ និងកម្មវិធីសទ្ទានុក្រមភាសាខ្មែរ ។ ជំនាញលេចធ្លោរបស់យើង គឺការចេះប្រើប្រាស់ប្រកបដោយយុទ្ធសាស្ត្រ នូវបច្ចេកវិទ្យាព័ត៌មានវិទ្យា ក្នុងការអភិវឌ្ឍន៍សង្គម ។
អានបន្ថែម...
ព័ត៌មាន
ពុធ, មីនា 28, 2018 - 14:39
The NGO Open Institute is the leading Cambodian organization applying technology to support the social and economic development of Cambodia. Open Institute's expertise brings together its deep knowledge of development issues in Cambodian society and innovative ideas on how to use technology to solve these problems. The Open Institute is working on several exciting programs in which technology is used to improve education, health, prevent human trafficking, or facilitate employment for unskilled workers. The organization works closely with UNICEF to support Education, Health, and Child Protecti... Read more
អង្គារ, ធ្នូ 5, 2017 - 11:31
សេចក្តីប្រកាសព័ត៌មាន សម្រាប់ផ្សព្វផ្សាយភ្លាម ថ្ងៃសុក្រ ទី០១ ខែធ្នូ ឆ្នាំ ២០១៧ដំណោះស្រាយស្វែងរកការងារតាមប្រព័ន្ធអ៊ីនធឺណេតរបស់កម្ពុជាឈ្នះរង្វាន់អាស៊ានបងភ័ក្រ គឺជាកម្មវិធីមួយដែលផ្តល់មូលនិធិដោយទីភ្នាក់ងារសហរដ្ឋអាមេរិកសម្រាប់ការអភិវឌ្ឍអន្តរជាតិ (USAID) ដើម្បីផ្តល់សេវាស្វែងរកការងារសម្រាប់អ្នកដែលមានជំនាញតិចតួច ត្រូវបានទទួលស្គាល់ដោយគណៈកម្មាធិការជាតិបច្ចេកវិទ្យាគមនាគមន៍ព័ត៌មានវិទ្យាអាស៊ាន (The 2017 ASEAN ICT Awards)
ថាជាគំនិតផ្តួចផ្តើមផ្នែកបច្ចេកវិទ្យាសម្រាប់ការអភិវឌ្ឍដ៏មានសារៈសំខាន់បំផុតប្រចាំឆ្នាំក្នុ... Read more
ពុធ, កុម្ភៈ 10, 2016 - 08:54
សេចក្ដីប្រកាសព័ត៌មាន
សន្និសីទថ្នាក់ជាតិលើកទី៣ ស្ដីអំពីសមភាពយេនឌ័រនៅក្នុងរបៀបវារៈអភិវឌ្ឍន៍ថ្មី
១១-១២ ខែកុម្ភៈ ឆ្នាំ២០១៦
ភ្នំពេញ ថ្ងៃ ទី ០៩ ខែកុម្ភៈ ឆ្នាំ ២០១៦
ក្រោមការឧបត្ថម្ភថវិកាពីអង្គការUN Womenប្រចាំប្រទេសកម្ពុជា និងរៀបចំដោយអង្គការវិទ្យាស្ថានបើកទូលាយ សន្និសីទថ្នាក់ជាតិស្ដីអំពី "គោលដៅអភិវឌ្ឍន៍ប្រកបដោយចីរភាព៖ការធ្វើឲ្យគោលដៅអភិវឌ្ឍន៍ប្រកបដោយចីរភាពដំណើរការសម្រាប់ស្ត្រីនិងក្មេងស្រីនៅប្រទេសកម្ពុជា" នឹងពិភាក្សាអំពីសមភាពយេនឌ័រ និងការផ្ដល់ភាពអង់អាចដល់ស្ត្រីនៅក្នុងរបៀបវារៈនៃការអភិវឌ្ឍថ្មី។ សន្និសីទនឹង... Read more
អង្គារ, កុម្ភៈ 10, 2015 - 17:58
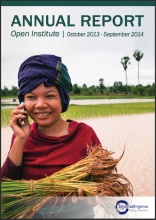
As the leading organization in Cambodia to use technology for development, this last year the Open Institute continued its work of applying viable and sustainable technological solutions that promote change towards a more just Cambodian society. The Open Institute believes in the potential of these technological solutions to increase access to high quality education, information, and communication in both urban and rural communities, leading to advances in social development and gender equality.
The largest program run by the Open Institute during this period is the USAID-funded SPICE program,... Read more
ព្រឹត្តិការណ៍
ច័ន្ទ, កក្កដា 14, 2014 - 17:28
សិក្ខាសាលាស្ដីពី «ការជំរុញតម្លាភាពតាមរយៈបង្កើនការទទួលបានព័ត៌មាន» ដែលបានប្រព្រឹត្តិទៅកាលពីថ្ងៃទី ៣ ខែកក្កដា ឆ្នាំ ២០១៤ នៅសណ្ឋាគារសាន់វ៉េ ភ្នំពេញ។ គោលបំណងនៃសិក្ខាសាលានេះ គឺធ្វើឡើងដើម្បីលើកកម្ពស់ការប្រើប្រាស់បច្ចេកវិទ្យាព័ត៌មានសារ គមនាគមន៍ និងព័ត៌មានវិទ្យា (ICT) ដើម្បីទទួលបានតម្លាភាពនៃព័ត៌មាន និងដើម្បីជំរុញប្រជាពលរដ្ឋចូលរួមយ៉ាងសកម្មក្នុងការប្រើប្រាស់ និងចែករំលែកព័ត៌មាន។ អ្នកដែលបានចូលរួមនៅក្នុងសិក្ខាសាលានេះរួមមានតំណាងយុវជន ក្រុមប្រឹក្សាឃុំ អង្គការក្រៅរដ្ឋាភិបាល និងអង្គការអន្តរជាតិមួយចំនួន។ សិក្ខាសាលានេះសហការរៀបច... Read more
សុក្រ, មេសា 4, 2014 - 09:06
លោក ប៊ុត ជិ នាយកមជ្ឈមណ្ឌលសិក្សាស្រាវជ្រាវ និងអភិបាលកិច្ច នៃក្រសួងមហាផ្ទៃ បានថ្លែងបើកសន្ទរកថា ក្នុងវគ្គបណ្ដុះបណ្ដាល សារព័ត៌មានប្រជាពលរដ្ឋ និងបច្ចេកវិទ្យា , ថ្ងៃទី ៤ ខែ មីនា ឆ្នាំ ២០១៤រូបភាព:វិទ្យាស្ថានបើកទូលាយ វិទ្យាស្ថានបើកទូលាយ ៖ នៅព្រឹកថ្ងៃទី៤នេះ នៅក្រសួងមហាផ្ទៃមានបើកវគ្គបណ្ដុះបណ្ដាលមួយដែលមានរយៈពេលបីថ្ងៃ ដើម្បីពង្រឹងសមត្ថភាពដល់ក្រុមយុវជន និងមន្ត្រីក្រុមប្រឹក្សាឃុំសង្កាត់លើការងារប្រមូល និងផ្សព្វផ្សាយព័ត៌មាន និងបច្ចេកវិទ្យាព័ត៌មាន។
ថ្លែងនៅក្នុងពិធីបើកវគ្គបណ្ដុះបណ្ដាលនេះលោក ប៊ុត ជិ នាយកមជ្ឈមណ្ឌលស្រាវជ្រាវអ... Read more
ច័ន្ទ, មីនា 17, 2014 - 11:47
អង្គការវិទ្យាស្ថានបើកទូលាយគឺជាអង្គការមិនមែនរដ្ឋាភិបាលនិងមិនរកប្រាក់ចំណេញ ដែលមានទស្សនៈវិស័យ ស្ដីពីប្រទេសកម្ពុជាថាជាប្រទេសមួយមានការសាយភាយឱកាសក្នុងការទទួលបានការអប់រំប្រកបដោយគុណភាពខ្ពស់ ផ្នែកព័ត៌មាន ការទំនាក់ទំនង និងបច្ចេកវិទ្យាដែលនាំធ្វើឲ្យមានការអភិវឌ្ឍហើយនឹងការប្រែប្រួលក្នុងសង្គមច្រើនជាងមុន។ បច្ចុប្បន្នអង្គការវិទ្យាស្ថានបើកទូលាយបានទទួលការគាំទ្រ ពីមូលនិធិពីអង្គការសហប្រជាជាតិសម្រាប់សមភាពយេនឌ័រនិងការផ្ដល់ភាពអង់អាចដល់ស្ត្រី ដើម្បីសិក្សាលើគម្រោងត្រួតពិនិត្យប្រព័ន្ធផ្សព្វផ្សាយដើម្បីបញ្ឈប់អំពើហិង្សាលើស... Read more
អង្គារ, តុលា 22, 2013 - 16:37
សកម្មភាពរបស់សិក្ខាកាម ក្នុងឱកាសបើកកម្មវិធីពិព័រណ៍កម្មវិធីបារខែមកំពង់ចាម។ កំពង់ចាមថ្ងៃទី២៣៤ ខែសីហា ឆ្នាំ២០១៣ រូបភាព៖ ពីBarCamp KampongCham Page Facebook ថ្ងៃទី១២ កញ្ញា ២០១៣ កំពង់ចាម៖ នេះជាលើកដំបូងហើយដែលកម្មវិធីបារខែមកំពង់ចាមបានរៀបចំឡើងនៅ សាកលវិទ្យាល័យ ជា ស៊ីម កំចាយមារ សាខាខេត្តកំពង់ចាម ចាប់ពីថ្ងៃទី ២៤-២៥ ខែសីហា ឆ្នាំ២០១៣ ហើយក៏ជាលើកទី៣ដែលកម្មវិធីបារខែមបានរៀបចំឡើងក្នុងឆ្នាំ២០១៣។
កម្មវិធីនេះបានផ្ដល់ឱកាសឲ្យអ្នកចូលរួមចំនួនសរុប ៦៥០នាក់ដែលជា យុវជន សហគ្រិន អ្នកជំនួញ អ្នកវិនិយោគ អ្នកច្នៃប្រឌិត និងបុគ្គលិកអង្គការសង្គម... Read more
ផ្សេងទៀត
ការចូលរបស់អ្នកប្រើ
ភ្ជាប់ទំនាក់ទំនងជាមួយយើង
កម្មវិធី
![]()


លុះត្រាតែបានបញ្ជាក់ បើមិនដូច្នោះទេ មាតិកានៃតំបន់បណ្តាញនេះត្រូវបានផ្តល់អាជ្ញាប័ណ្ណក្រោមអាជ្ញាប័ណ្ណ
Creative Commons Attribution-Noncommercial-Share Alike 3.0 License.
វិទ្យាស្ថានបើកទូលាយ (OI) ២០០៧-២០១០